I'm not going to explain why it occurs, but further info is here should you need it.
What i am going to show you is my method for its removal.
Here is the problem photo courtesy of John B. Griffith
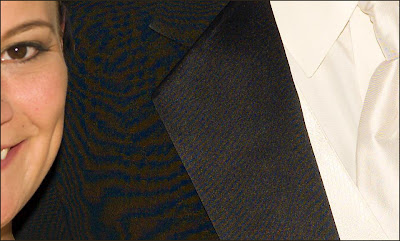
image © John B.Griffith
Problems like the one above look to be beyond saving, but all is not lost.
Firstly convert image into Lab colour space– image>mode>Lab Colour.
Then duplicate the layer so that you are working on a copy– Layer>Duplicate Layer.
Next select the area with the moiré with your usual selection method.
If you then select the b channel in the channel palette you will see the problem noise:
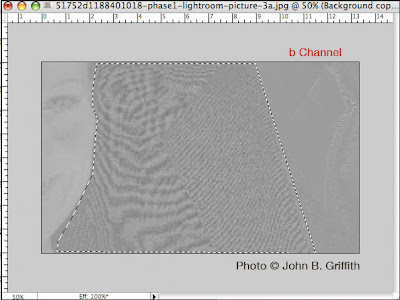
The noise is clearly visible in the b channel, also if you check the L (luminance) channel it has an identical pattern.
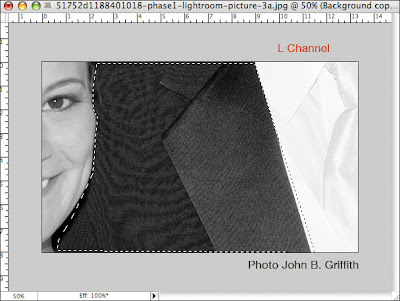
Most people who work in Photoshop L*a*b mode to remove moiré just blur the a and b and we can do that too but
normally when people see noise in the L channel they believe the image to be beyond saving as the luminance channel has been damaged.
So what we are going to do is use the 'Apply Image' command in the image menu to use the noise in the b channel to knock out the noise in the L channel as below.
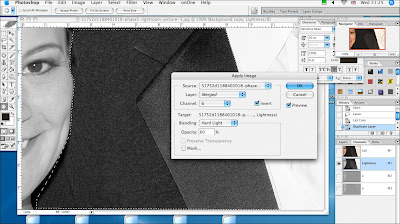
As you can see the L channel has lost the noise, varying the opacity will further enhance the effect 60% was chosen here.
Here is a close-up of the settings in the Apply Image command.
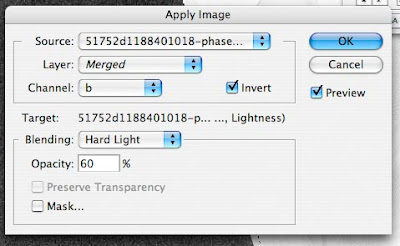
The important settings are that the 'Invert' box is ticked the b channel is selected the target is the L blending is normally Hard light or Soft Light and the opacity is varied to cancel out the noise.
Finally you must then go into the a and b channels and apply Gaussian Blur until no detail can be seen.
And here is the result
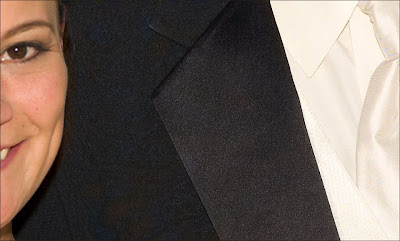
Not perfect, but playing with the opacity and blend mode will yield even better results, and certainly better than could be expected from most other methods.
I would like to than John B. Griffith for making this shot available the picture is his copyright, please respect that.
all words and text © Mark Antony Smith
8 comments:
This is awesome! I had worries about the AA filter-less D800E I ordered but now that you outlined how to deal with luminance moire I'm not worried at all. Thanks for sharing your workflow!
It worked! Thankyou!
Brilliant – this rescued a leading image for a major client of mine. Also, great that this is from New Zealand, as a New Zealander!
We've had a lot of satisfied customers in 2012; we plan to close out the new year by offering some really cool stuff Moving Masks.
I found very good and I would like to congratulate you for your work
Prepress Service
This seems useless. I'm applying the image from b channel in lab, and there is basically no difference. It's ever so slightly lightened. It's inverted, it's set to hard light (tried soft light as well). even at 100% b channel does nothing to cancel the noise. Might work on some black thing like this which basically has no detail... but on something bright, no effect at all.
Wow! It's awesome blog post here.... really very interesting for reading.....
clipping path service provider
Wow! It's awesome blog post here.... really very interesting for reading.....
clipping path service provider
Post a Comment